Thursday, September 5, 2013

MY NEW LAKSA RECIPE

السلام عليكم
Peace be upon you

How are you darlings? Did you still remember, I've told you that I've tried new recipe for my laksa on last Merdeka Day (Independent Day)? So today I would like to share with you what's the different between 'Laksa Utara' and my laksa.


Ingredients

Laksa Soup / Broth

1. 1 1/2kg mackerel fish
2. 1 1/2 cups dried chillies (depend on you)*
3. 7-8 shallots*
4. 3 garlic cloves*
5. 1 thumb size belacan (shrimp paste)*
6. 1 tsp tamarind paste (I used Adabi brand)
7. 4-5 pcs dried garcinia atroviridis (asam keping/gelugor- medium size - for the soup)
8. 5 pcs dried garcinia atroviridis (asam keping/gelugor - to boil with mackerel)
9. Water (to boil the mackerel)
10. 3 - 3.5 liter water (for laksa soup/broth)
11. 6 cm galangal root*
12. 5 cm ginger*
13. 4 cm tumeric root*
14. 1 tumeric leaf
15. 1 - 1/2 cups vegetable oil
16. 1 bunch of Vietnamese Mint (Daun Kesom - ambil daun aje tau)
17. 3-4 stalks Torch Ginger / Etlingera Elatior - halved (Bunga Kantan)
18. 1 stalk lemongrass (crushed)
19. Salt (depend on you)

Garnish

1. Cucumber (finely sliced)
2. Onion (finely sliced)
3. Pineapple (thinly sliced)
4. Mint leaves
5. Torch ginger (finely sliced)
6. Bird's eye chillies (finely sliced)
7. Red chillies (finely sliced)
8. Hard boiled egg (halved)
9. Loose leaf lettuce (sheredded)
10. Egg pancake (thinly sliced)

Rice Noodle / Laksa 

1. I use the ready made laksa instead of the dried one. (Senang idop dek non oi)


Method

1. Boil the mackerel with asam keping/gelugor till tender. Let it cool and separate the fish bone and the fillet. Pour the fish fillet into the food processor and blend it well.

2. In a big pot, heat the vegetable oil and pour in the grinded * ingredients. Cook for 10 minutes and pour in a cup of water. Cook for another 20 minutes.

3. Once the grinded ingredients fully cooked and become so aromatic, pour in the blended fish and also add in the asam keping. Cook for 10 minutes and add in water, vietnamese mint, torch ginger, tumeric leaf and lemongrass. Boiled the broth for 45 to 60 minutes or till the broth lil' bit thicken and add in the salt.

4. Place the rice noodle / laksa in a bowl, pour in the broth and garnish with cucumber, onion, lettuce leave, pineapple, torch ginger, mint leave, hard boiled egg, egg pancake, bird's eye chillies and red chillies.

Note :

1. You can have your laksa with 'otak udang' as well.

The taste sooooo good for my taste buds. Tapi I tak tau lah kalau orang lain kan? Aduhai.. bertakung air liur dalam mulut ni.


Kalau tak silap, kat entry laksa yang sebelum ni I ada update macam mana nak buat egg pancake tu. Ada yang suka jadikan sebagai fritter (cucur), katanya lebih rangup. Mine, I did it with my own ways. :)

Amacam? Tergoda tak tengok my laksa soup/broth ni? Hehehehe

You've to try it and please let me know the result and YAY or NAY.. :)


Love,
Honey

Monday, September 2, 2013

GIANT FRESHWATER PRAWNS IN SPICY COCONUT BROTH & HI-TEA

السلام عليكم
Peace be upon you

Rasanya masih belum terlambat untuk ucapkan Selamat Hari Merdeka untuk semua rakyat Malaysia. Pergi celebrate ke Dataran Merdeka kah anda semua? Den? Den dok umah ajo.. den sibok masak on that day. Kalau takde apa-apa event pun tak kuasa mak nak ke sana. Berhimpit-himpit, berpoloh-poloh.. lebih baik den duduk di rumah berkebun and minum teh kikiki.


Hari merdeka haritu I buat la makan-makan sikit and minum petang untuk relatives. Alah, bukan makan-makan grand gitu. Saja buat simple dishes untuk diaorang.. pastu ajak jiran I dua tiga orang, kawan I dua tiga orang, kakak I dengan family dia and boyfriend I, itu aje lah. Cousin I kesedapan makan laksa yang I buat haritu. Sampai dua kali tambah katanya. Niece I pulak bila I offer nak laksa ke tak dia jual mahal. Katanya dia tak minat tapi suddenly dia kata "Urm nak rasa sikit lah laksa ni" Dia pon makan lah laksa tu. Dah nak habis laksa tu, sambil hirup kuah laksa sambil cakap "Sedap lah laksa ni". Hahahaha tadi jual mahal, bila dah pekena dia suka lah pulak. Boleh kalah laksa penang habaq ang! Hahahaha. Sebenarnya laksa yang I buat kali ni, I guna recipe baru. Nanti bila gambar dah ready I akan update resepi untuk laksa tu naaa.


Gambar kat atas ni I captured by phone aje and upload ke laman sosial Instagram. Bagi taste buds I, recipe baru ni tersangat sedapnya lah sedap!Tapi kawan I tu kata kuah kurang pekat lah, kurang masin lah.. Dia memang suka kritik I hehe.Biasa lah, taste buds orang ni kan lain-lain?

Masa pergi pasar borong pagi Sabtu tu, I teringin lah nak makan udang galah. Sekilo RM27.00 jadi I pun beli lah. Tak sampai sekilo pon.. Ye lah, makan berdua aje dengan my mom. Beli sampai sekilo siapa nak makan ye dak? Nama saintifik udang galah ni bukan main lah dasyatnya! Terbelit lidah nak menyebutnya. Udang galah ni udang air tawar iaitu sungai jadi kita jugak boleh panggil sebagai giant freshwater prawns.
So hari ahad tu kitaorang pon masaklah udang galah ni. Buat masak lemak cili api dengan nanas. Sedapnya lah hai.. Maunye tak sedap??? Kebetulan ahad tu bf I datang lagi, jadi I suh makan tengahri dulu sebelum kita orang keluar. Sampai TIGA kali tambah!! Terkejut I.. Selalu jarang bertambah. Lapar katanya....


Ingredients

1. 10 giant freshwater prawns (medium size, cleaned)
2. 1/4 pineaple (sliced about 1 cm thick)
3. 3 shallot (grated)
4. 1 garlic clove (grated)
5. 5 bird's eye chillies (grounded-depend on you, if you want more spicy then add more chillies)
6. 100 ml water
7. 200 ml coconut milk
8. 1/2 - 1 tsp salt (depend on you)
9. 1/2 tsp tumeric powder

Method

1. Add shallot, garlic, chillies, pineapple and water in a medium pot. Simmer for 15 minutes or till the pineapple lil bit tender.

2. Pour in the coconut milk, tumeric powder and salt into the pot and boil for 2 minutes (sambil kacau, if not nanti naik minyak). Add in the prawns and cook for a minute. Ready to serve with hot steamed rice.

Note :

1. You can add the tumeric leaf to get extra turmeric fragrance.


The taste so nice and you can taste the sweetness from the prawns and pineapple. :)

Love,
Honey.

Monday, August 26, 2013

PENJAGAAN POKOK KARI

السلام عليكم
Peace be upon you

Apa khabar you all? Banyak ke jemputan open house? Al maklumlah, sekarang ni masih lagi open house di sana dan sini. Mesti berat badan pun semakin naik kan dek makan macam-macam makanan sedap kat open house tu hahaha. I pulak tak banyak jemputan pun :)

I ada upload pokok kari I yang daunnye gemok-gemok tu kat laman sosial (ceh 'laman sosial'! Ayat baku for today okay hehe) Instagram. Jadi ada lah one of my IG friends dari Melaka request tunjuk cara macam mana nak jaga pokok kari supaya dia gemok, sihat dan berkilat daunnye. Disebabkan niece I bawak 'lari' DSLR ke MRSM so I guna camera handphone ajo lah yo?? Jadi harap maklum la yo gamba nyo idok la cantik sangat :)


1. Yang pertama, you all kena lah gemburkan tanah nya dulu sebelum melakukan pembajaan. Untuk pengetahuan you all proses semua ni mesti lah di buat pada waktu pagi sebab pada waktu pagi lah pokok memulakan proses fotosintesis. Selalunya I akan gemburkan tanah setiap dua hari sekali. Ini bagi memastikan tanah tidak menjadi mampat. Jika tanah terlalu mampat, ini akan mengganggu pembesaran pokok kari ni. Tanah yang di gunakan tidak semestinya tanah organik. Tanah biasa pun boleh yang you all boleh dapat kat mana-mana nursery dengan harga RM1.50 setiap satu bag. Kalau pakai organic soil pon boleh.. Tapi jangan pulak pakai tanah liat hehe.


2. Pembajaan boleh dilakukan 2 minggu sekali. Kalau nak bagi makan pokok ni 2 minggu sekali, baja tu lebih la sikit like 2 sudu plastik macam dalam gambar ni. Tapi kalau nak bagi makan seminggu sekali, satu sudu pun dah mencukupi. Pilih lah baja untuk sayuran instead of untuk pokok hijau sebab itu lebih baik. Yang I guna ni memang baja untuk pokok-pokok herba macam pokok kari, pokok basil dan sebagainya. Satu botol keciL (tinggi lebih kurang 10cm) harganya RM7.00.


3. Lepas bagi makan kita bagi lah dia minum pulak kalau tak 'tercekik' lah dia nanti. Hahaha air yang cukup di perlukan untuk proses fotosistesis. Tapi janganlah pulak siram pokok ni sampai bertakung airnya dalam pasu tu. Lebih air pun tak bagus juga untuk akar pokok ni. Lain lah kalau pokok ni di tanam tanpa pasu, nak siram satu baldi pon boleh kikiki.

Daunnye lebih besar dari ibu jari I :)

4. 3 proses di atas adalah wajib di lakukan. Tapi pada pendapat I, pokok harus lah di belai barulah dia akan cantik menghijau dan sihat. I selalu belai daun-daun pokok kari ni and kadang-kadang I akan bercakap dengan dia (ada yang berpendapat, apabila kita berkomunikasi dengan pokok, ia dapat merangsangkan pertumbuhan pokok). Cakap slow-slow dah la, kang ada pulak orang kata you all gila coz bercakap dengan pokok. I akan selalu sembang dengan pokok ni like "Hi how are you today?" "Besar lah dengan sihat, cantik dan gemok". Kadang-kadang si SNOWY pun akan sibuk nak 'belai' pokok ni (bukan belai macam kita tapi di kais-kaisnye daun tu dengan tangan dia tu hahaha)


Tengok lah daun kari I ni, lebar setangkai daun kari ni sama besar dengan lebar tapak tangan I. Setiap orang yang datang ke rumah mesti akan tegur pokok kari I ni "Besarnya daun dia!" Apa nak buat, tuan dia bagi makan dan minum cukup jadi dia membesar lah dengan sihat dan gorgeous gitu! Sebenarnya, asal pokok kari ni daunnya tak lah sebesar macam sekarang. Daunnya normal aje, and tanam kat atas tanah tanpa pasu. Tapi di sebabkan si 'monster' aka kumbang putih tu merosakkan semua daun kari I, I pun tebang lah. Tapi anak pokok kari ni punya lah banyak tumbuh. Jadi I ambil satu dan alihkan ke dalam pasu.


I agak sedih sejak balik dari kampung after raya haritu. Mau taknya, daun baru tumbuh jadi kedut-kedut and dah tak cantik. I tak tau kenapa, I rasa sebab my neighbour tak siram frequently kot. I pesan dengan dia tolong siramkan pokok-pokok I and I alihkan pokok kari I ni dekat dengan rumah dia and letak kat kawasan yang terima terlalu banyak cahaya matahari. I rasa sebab tu lah daunnya jadi macam ni and I was thinking to cut down the upper stem. So that dia boleh keluarkan semula daun yang cantik dan mula bercabang butttttt....... rasa sayang and kesian la pulak kalau I potong kat atas tu. Takpe, I tunggu lagi 2 minggu, kalau daun baru masih lagi kedut-kedut I have to decide and cut it off.

Sourced by google
Pokok kari ni di gemari ramai terutamanya monster ni.. I cukup anti dengan kumbang putih ni. Ia merosakkan daun kari dan takkan tinggalkan satu pun daun yang elok. Jadi you all mestilah selalu membelek pokok kari you all kot-kot ada monster ni terumatanya anak-anak dia. Kalau jumpa lenyek terus bagi mati. Kau tak, pokok kari you yang akan mati.

Sourced by google
Anak dia lebih kurang macam gambar kat atas ni.. tertonggek aje ekornya tu. Tapi warna hitam.. Kalau I jumpa punya lah geram I.. memang I kutip kesemuanya and bagi mati.

So I harap dengan penjelasan I tentang penjagaan pokok kari ni dapat lah membantu serba sedikit. Tak susah pun nak jaga cuma kena rajin saja.

Dah lama tak update makanan yang sedap-sedapkan? Nanti I upload new recipe harap you all senantiasa melawat my humble blog ni ye. Terima kasih.

Love,
Honey


Friday, August 23, 2013

DEEP FRIED GROUPER WITH MANGO SAUCE

السلام عليكم
Peace be upon you

The homemade foods much delicious than outside because we cook it with lot of loves. I don't have any special gifts to be given to my partner on his last birthday on February 2013, so I cooked for him which makes him sooo happy! Maunye tak happy ek? Tak payah keluar duit tuk makan kat  luar and dia tak payah penat-penat drive and stuck in jam. Cuma penat drive ke rumah I aje lah hehehe. He loves my cooking very much and according to him, kalau I bagi racun pun dia akan makan hahaha.. That's not funny at all.

So today, I would like to share with you the recipe of deep fried grouper with mango sauce. Since my apple mango tree produced lot of fruits, I use the ripe ones to be added in my sauce / salsa.

DEEP FRIED GROUPER

Ingredients

1. 1 medium size grouper fish (cleaned, rinsed and pat dry)
2. 1 cup of corn flour (to coat the fish)
3. 1/2 tsp salt (to marinate the fish)
4. 800 ml vegetable oil

Method

1.  Marinate the fish with salt and coat it with the corn flour.

2. Heat the vegetable oil in a wok and deep fried the fish until golden brown for both side. Put aside.

MANGO SAUCE / SALSA

Ingredients

1. 3-4 tbsp cooking oil
2. 3-4 tbsp chilli paste (I blend dried chillies with shallot, garlic and shrimp paste)
3. 1/2 cup mango juice (I'm using the ripe mangoes)
4. 1/4 cup ripe mango (diced)*
5. 2-3 tbsp fish sauce
6. 1/4 cup white sugar
7. 2-3 tbsp ketchup (tomato sauce)
8. 1/4 cup pineapple (diced)*
9. 1/4 cup red capsicum (diced)*
10. 1/4 cup yellow capsicum (diced)*
11. 1/4 cup cucumber (diced)*
12. 1/4 cup coriander leaves (copped)
13. 100ml -200ml water
14. 2 tbsp corn flour (for thicken)

Method

1. In a medium sauce pan, heat the cooking oil. Add chilli paste and cook for 5 minutes or till frangrance. Add ketchup, sugar, mango juice and fish sauce and mix them well.

2. Pour the water into the sauce pan and let it boil. Once boiled, mix the corn flour with water and pour into the sauce. Add the * ingredients and let it boil again till the sauce lil bit thicken.

3. Place the fish on a plate and pour the sauce over the fish and garnish with copped coriander leaves. Ready to serve.

Note :

1. Kalau nak nampak cantik, belah perut ikan sampai ke belakang dan masa menggoreng kembangkan ikan tu macam rama-rama and deep fried belah bawah dulu..baru lah nampak cantik bila ikan on the plate. :)

2. Tujuan coat ikan dengan corn flour ialah untuk dapatkan ikan yang rangup walaupun dah di tuang sos.


This recipe kind a similar with sweet sour barramundi but for deep fried grouper with mango salsa, I just added the mango juice for the awesome taste.


Love,
Honey

Wednesday, August 21, 2013

YAM CAKE a.k.a ORH KUEH a.k.a PENGAT KELADI / TALAM KELADI

السلام عليكم
Peace be upon you

I love yam cake very much eventhough lot of Malays never taste it before. Since I like to eat Chinese foods, yam cake will always sounds good to me. The taste of dried shrimp really make me enjoy the kuih and it's more delicious when you have it with the delicious sweet sauce.

This is my first trial in making the yam cake and the result.... was awesome! :)

YAM CAKE

Ingredients

1. 500gm yam, diced into 1-2cm cubes
2. 1 bowl rice flour
3. 2 tablespoons wheat starch
4. 240-250ml water
5. 100gm - 200gm dried shrimps (depend on you, I love to top my cake cake with lot of dried shrimps)
6. 50gm Dried Chinese mushroom (rince and soak in the water - chooped)
7. 5 shallots, finely chopped
8. 1 teaspoon five spice powder
9. ½ teaspoon salt
10. ½ teaspoon white pepper
11. 3-4 tbsp cooking oil

Garnish

1. deep fried shallots
2. spring onions (finely sliced)
3. red chillies (finely sliced)
4. dried shrimps deep fried and chopped

Method
1. Rinse and soak the dried shrimps in water and squeeze dry. Heat oil in a wok and fry the onions and dried shrimps (1/4 from the portion - chopped first) until they become aromatic. Add in the dried mushroom and mix them well. Cook for 5-10 minutes.

2. Add the cubed yam into the wok, and fry it with the dried shrimps mixture until it browns.

3. In a separate bowl, mix the rice flour, wheat starch and water, and stir until it forms a smooth paste. Mix them well to ensure there are no lumps in the mixture.

4. Add the flour mixture into the wok slowly, and stir until everything forms a thick paste.

5. Add the salt, pepper and five spice powder, and mix them well.

6. Pour the mixture into a cake pan and steam over high heat for 45 minutes, or until cooked.

7. To serve, sprinkle with deep fried shallots, chopped spring onions, sliced of chillies and chopped dried shrimp (you have to deep fried the dried shrimps till crispy and chopped).

Note :

The wheat starch helps to make the yam cake softer in texture.

SWEET SAUCE

Ingredients

1.  2 tbsp Taucu (fermented soy beans paste)
2. 300ml water
3. 1/2 cup white sugar
4. 4 tsp corn flour (mix with water for thickeness)
5. 1 tbsp Light Soy Sauce
6. 3 tbsp Dark Soy Sauce

Method

1. Blend well the taucu with water in food processor.

2. Pour the taucu mixture in a sauce pan. Cook till boil and reduce to medium heat. Add in sugar and stir them well.

3. Add in the light soy sauce,  dark soy sauce and pour the corn flour mixture. Simmer under the medium heat and stir occasionally until the sauce is thicken. Ready to serve.

Note : You may sprinkle the sesame seeds on top of the sauce.


Try it and am sure you will like it.

Love,
Honey
Ingredients:
2 tbsp Taucheo (fermented soy beans paste / 豆酱)
300ml of water
1/2 cup White Sugar
4 tsp Cornflour + 4 tbsp water (mix well)
1 tbsp Premium Light Soy Sauce
3 tbsp Premium Dark Soy Sauce

Method:
1. Put Taucheo with water in a food proccessor. Blend well.
2. Pour Taucheo paste in a sauce pot. Bring to a boil. Reduce to low fire.
3. Add in sugar, stir and mix well under low fire about 10 mins.
4. Add in cornflour mixture and stir well. Add in dark soy sauce and light soy sauce.
5. Simmer under low fire and stir occasionally until the sauce is thicken.

Note:
• This time I didn't add in the pre-fried dried shrimp and fried shallot into the yam cake, instead I used them for topping.
• You may use either smooth or chunky bean paste. I used smooth version.
• Adjust the amount of corn flour to achieve the desired thickness.
• Adjust the amount of sugar according to your taste. You may substitute white sugar with brown sugar.
• Simmer under low fire, stir occasionally until sauce is thicken.
• The sauce shouldn't be too watery nor too thick. Check the consistancy of the sauce from time to time. - See more at: http://bits-of-taste.blogspot.com/2010/09/sweet-sauce-for-yam-cake.html#sthash.GBQZN3Bp.dpuf
Ingredients:
2 tbsp Taucheo (fermented soy beans paste / 豆酱)
300ml of water
1/2 cup White Sugar
4 tsp Cornflour + 4 tbsp water (mix well)
1 tbsp Premium Light Soy Sauce
3 tbsp Premium Dark Soy Sauce

Method:
1. Put Taucheo with water in a food proccessor. Blend well.
2. Pour Taucheo paste in a sauce pot. Bring to a boil. Reduce to low fire.
3. Add in sugar, stir and mix well under low fire about 10 mins.
4. Add in cornflour mixture and stir well. Add in dark soy sauce and light soy sauce.
5. Simmer under low fire and stir occasionally until the sauce is thicken.

Note:
• This time I didn't add in the pre-fried dried shrimp and fried shallot into the yam cake, instead I used them for topping.
• You may use either smooth or chunky bean paste. I used smooth version.
• Adjust the amount of corn flour to achieve the desired thickness.
• Adjust the amount of sugar according to your taste. You may substitute white sugar with brown sugar.
• Simmer under low fire, stir occasionally until sauce is thicken.
• The sauce shouldn't be too watery nor too thick. Check the consistancy of the sauce from time to time. - See more at: http://bits-of-taste.blogspot.com/2010/09/sweet-sauce-for-yam-cake.html#sthash.GBQZN3Bp.dpuf
Ingredients:
2 tbsp Taucheo (fermented soy beans paste / 豆酱)
300ml of water
1/2 cup White Sugar
4 tsp Cornflour + 4 tbsp water (mix well)
1 tbsp Premium Light Soy Sauce
3 tbsp Premium Dark Soy Sauce

Method:
1. Put Taucheo with water in a food proccessor. Blend well.
2. Pour Taucheo paste in a sauce pot. Bring to a boil. Reduce to low fire.
3. Add in sugar, stir and mix well under low fire about 10 mins.
4. Add in cornflour mixture and stir well. Add in dark soy sauce and light soy sauce.
5. Simmer under low fire and stir occasionally until the sauce is thicken.

Note:
• This time I didn't add in the pre-fried dried shrimp and fried shallot into the yam cake, instead I used them for topping.
• You may use either smooth or chunky bean paste. I used smooth version.
• Adjust the amount of corn flour to achieve the desired thickness.
• Adjust the amount of sugar according to your taste. You may substitute white sugar with brown sugar.
• Simmer under low fire, stir occasionally until sauce is thicken.
• The sauce shouldn't be too watery nor too thick. Check the consistancy of the sauce from time to time. - See more at: http://bits-of-taste.blogspot.com/2010/09/sweet-sauce-for-yam-cake.html#sthash.GBQZN3Bp.dpuf


Thursday, August 15, 2013

IT'S ALL ABOUT EID UL FITR 2013

السلام عليكم
Peace be upon you

Happy Eid Ul Fitr to all Muslimin and Muslimah. Truly sorry for the long silent due to limited internet access during my raya holiday at my hometown. By the way, there's nothing to tell about my raya celebration. Just like past years, my routine to visit my realatives on Hari Raya but this year we did it on the 1st Hari Raya instead of 2nd day.

Not much of Hari Raya photos this year and I am not even have any photos on my 1st raya. Too bad huh? Let me share with you some photos on 2nd raya day which makes me so busy on that day preparing some food spread for my relatives. I can't believe that I had my first dish at 5.30 in the evening on that day. Punya lah sibok kan? Maunye tak sibok, pagi tu prepare juadah untuk tetamu then pukul 11.30am pergi melawat aunty I kat Hospital Taiping sebab dia belum balik lagi lepas bersalin. Balik je rumah terus melayan relatives sebab semuanya sampai serentak. Bayangkan I takde duduk langsung kat living hall lepak dengan diaorang sebab terlalu sibuk di dapur. My mom aje yang layan diaorang kat depan nun. After that, kemas-kemas terus ke rumah aunty I pulak ikut diaorang, baru lah dapat jamah makanan.


Menu yang paling senang, simple and pastinya lazat ialah meehoon / koay teow sup. Semua di campak-campak aje.


Modern VS Vintage. Yang vintage nye ialah koleksi pinggan my mom tu. Bertahun dah dia simpan. Dulu dia kata RM4.00 je kalau tak silap untuk 1 dozen.


This picture was taken on 3rd raya day at my aunt's. The beautiful next to me is my cousin's wife. Tengok lah baju raya I, baju raya tahun lepas I recycle untuk raya ketiga tahun ni. Baru berangan nak shoot gambar berlatarbelakangkan sawah padi yang menghijau or kekuningan, hampeh! Padi dah di tuai dek non oiiiiii.

Nanti lah, kalau ada lagi gambar open house ke apa ke, I upload lagi ok. Di kesempatan ni I nak ucapkan SELAMAT HARI RAYA AIDILFITRI, MAAF ZAHIR DAN BATIN.

Love,
Honey

Thursday, August 1, 2013

THE STORY OF 23 RAMADHAN 1434 & SAMBAL UDANG (PRAWNS IN SPICY SAUCE)

السلام عليكم
Peace be upon you

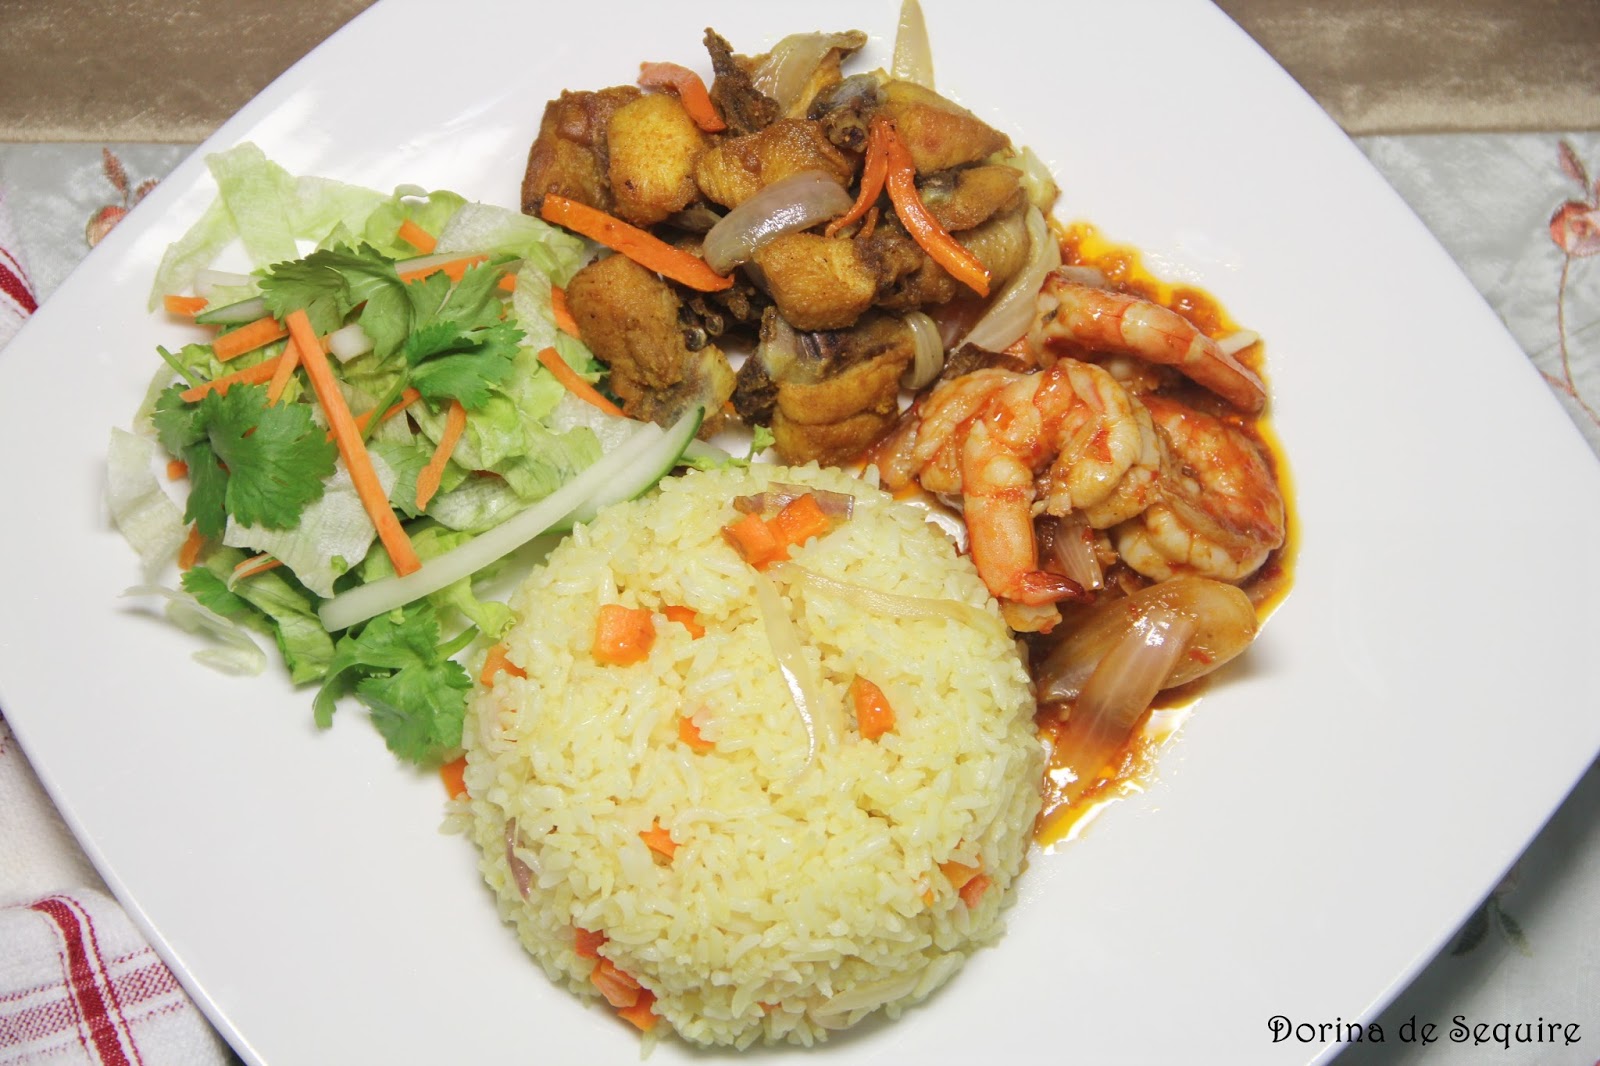
 I had Nasi Goreng + Ayam Goreng Kunyit since Monday and I bought it from a restaurant near my house. Their Ayam Goreng Kunyit was nice and same goes to Nasi Goreng and still ordered for it on Tuesday evening for IFTAR. And yesterday, I couldn't refused to have it again for the third time for IFTAR so I cooked by myself. I had nasi goreng (Similar to Yong Chow Fried Rice, but I use my own recipe), sambal udang, ayam goreng kunyit and mix salad. It was fixed my craving :)


Ingredients

1. 6-7 peeled prawns (L size)
2. 2-3 tsp fish sauce
3. 3 tbsp chilli paste (Chilli paste ingredients : dried chilli, shallot and shrimp paste)
4. 1 tbsp sugar
5. 1/2 onion (cut to 6)
7. 2 tbsp ketchup (tomato sauce)
8. 2 tbsp cooking oil
9. 1/4 cup of water

Method

1. Heat oil in a wok. Once hot, add chilli paste and stir well till simmer and fragrance. Add water and let it simmer again.

2. Add in the fish sauce, sugar, ketchup and onion. Stir and mix them well. Leave it for a minute.

3. Add in the prawns and stir well for a minute, turn off the fire and ready to serve.


Note :

1. Stir in the prawns for a minute is the best way to get the crunchy and fresh prawns.

Tengok lah butiran nasi tu. Cantik and perfect je kan? 

The fragrance of coriander leaves made the salad more delicious and smelled good.

As I told you before, don't overcooked the prawns because you won't get the juicy and fresh prawns.

I loveeeeee that Ayam Goreng Kunyit :)

I am sure that you will fall in love with my Sambal Udang and Good Luck! :)

Love,
Honey